Studio Photography
by Philip Greenspun
Why go into the studio?
Studio photography is easy because you can get exactly what you want. Studio photography is hard because you can get exactly what you want.Soft light, hard light, hair light, background. Everything is under your control. If you are a tremendously creative person who knows how to use studio equipment, you'll get wonderful results. If you are uncreative, you'll have very flat and boring results. If anything is wrong with the lighting balance or exposure, you'll have nobody to blame but yourself.
Rent or buy?
Most big cities have good rental studios that come complete with lights, backgrounds, and often assistants. This is the way to go if you have a big budget and know exactly when you want to shoot. Having your own studio, especially at home, is great for spontaneous work and also because you can take some of your equipment on location.
Ceiling or floor?
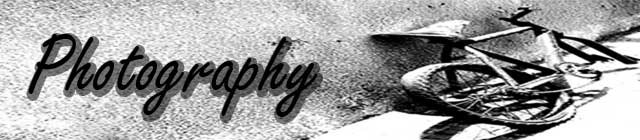
Decide whether you want your studio to be floor-based or ceiling-based. A floor-based studio means that you have lightstands for the lights and background supports for the background. All of these supports are very lightweight because they are designed to be portable. You'll be treading very carefully and/or you'll be knocking things over.
In a ceiling-based studio, you mount background rollers on the ceiling and a rail system that allow flexible positioning of lights anywhere within a rectangular area. A ceiling-based studio costs about $1000 more than a floor-based one, but is a much nicer place to work since you don't have to worry about knocking lights over.
The coolest part of any rail system is the pantograph light support. These pull down from the ceiling and are cleverly counterbalanced so that they just stay wherever you leave them. You just grab a light and move it up or down an inch and it stays there. Pure mechanical design magic. As far as I know, the Manfrotto Skytrack system (my personal choice; explained at www.manfrotto.com), a FOBA system (imported by SinarBron), and the Calumet system (www.calumetphoto.com) are the only rail systems available in the US.
The Lights
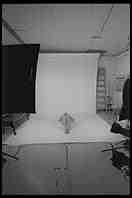
Decide what format camera you'll be using. Bigger cameras require smaller apertures to get adequate depth of field and hence more light. Decide how big your subjects are going to be. Head-and-shoulders portraits require much less light than automobiles.
To learn about hot lights, read one of the many good books written for cinematographers on the subject. With flashes, 500 watt-seconds is sufficient for digital or 35mm photography of people at full-length. The smaller strobe systems also work for 4x5 view camera photography of tabletop subjects. Most serious studio photographers start with about 2000 watts-seconds, which is adequate for 4x5 photography of large subjects, and will rent another pack if they have to light something huge.
Sunlight
If you have any windows in your studio, you might be able to use the sunlight coming in. The color temperature of sunlight varies from about 2000K at sunrise to 4300K in the early morning to 5800K at high noon in midsummer. [Note: the sun streaming into a window is different from what you get if you take your subject out into the open. "Daylight" is a combination of sunlight (around 5500K) and skylight (approx 9500K), averaging to around 6500K in the summer. Clouds or shade push the color temperature much bluer, up towards 9000K, though an overall overcast is usually 6000K.
Cold Lights
"Cold lights" are electronic flashes, much more powerful than the ones on your camera but basically the same idea. Studio strobes come in two flavors: monolights and powerpack/head systems. The business end of both is the same, a flash tube surrounding an incandescent bulb. The incandescent bulb, usually around 100 watts, is the "modeling light," used by the photographer to judge lighting effects and ratios. These aren't very effective if the ambient light in the studio, e.g., from windows, is high. In the old days, most photographers would burn a few Polaroids to make sure that the lights are properly set. In the digital era, the easiest way to preview is with a digital camera directly connected to a computer, with each new exposure displayed on a big LCD monitor.
A monolight has a wall outlet on one end, a flash tube on the other, and a big block of capacitors in between. These are nice for location work because you don't have have a lot of cables running around. Using several monolights together isn't as much of a problem as you'd think because (1) good monolights have a 4 or 5 f-stop output adjustment control, and (2) most monolights have a built-in slave so that when one fires, they will all fire.
In a powerpack/head system, you have one big heavy capacitor-filled power pack and a bunch of relatively lightweight heads connected by high-voltage cables to the powerpack. You can adjust the lighting power among the heads and also the overall light output. These are the most flexible and most commonly used studio flash systems. Flash power is specified in watt-seconds (joules), somewhat confusingly abbreviated as "w/s".
Choosing a brand of studio strobes is a similar process to choosing an SLR camera system. If you buy the wrong brand, you may have to scrap your entire investment as your ambitions grow. In the world of monolights, Sunpaks are cheap (around $300 each for 500 w/s or in a 1600 w/s kit), have been around for a long time, and allow stepless power adjustment over a 5 f-stop range. Sunpak makes an interesting combination monolight/softbox called a DigitFlash that is probably ideal if you're sure that you never need a hard light. If you feel like spending twice as much money for the same power output, there are monolights from a lot of professional strobe vendors that will possibly accept a wider variety of light-control accessories.